Recommended tours
Review & Earn Travel Money
At TripsPoint you have endless possibilities to earn TripsPoint Money - this is your Travel Money your can use to book you next tours and activities everywhere you go.
Here's Space For Everyone
New tours
We stand together! Support Ukraine against Russian aggression!

How to add photo to your article at TripsPoint
How to add photo to your article at TripsPoint
Here' simple illustrated instruction explaining how to add photos from your computer to an article you are writing in TripsPoint submission form. First of all - we highly recommend using the Chrome browser to submit articles to TripsPoint. With other browsers, you may experience problems uploading photos to the article between the text sections.
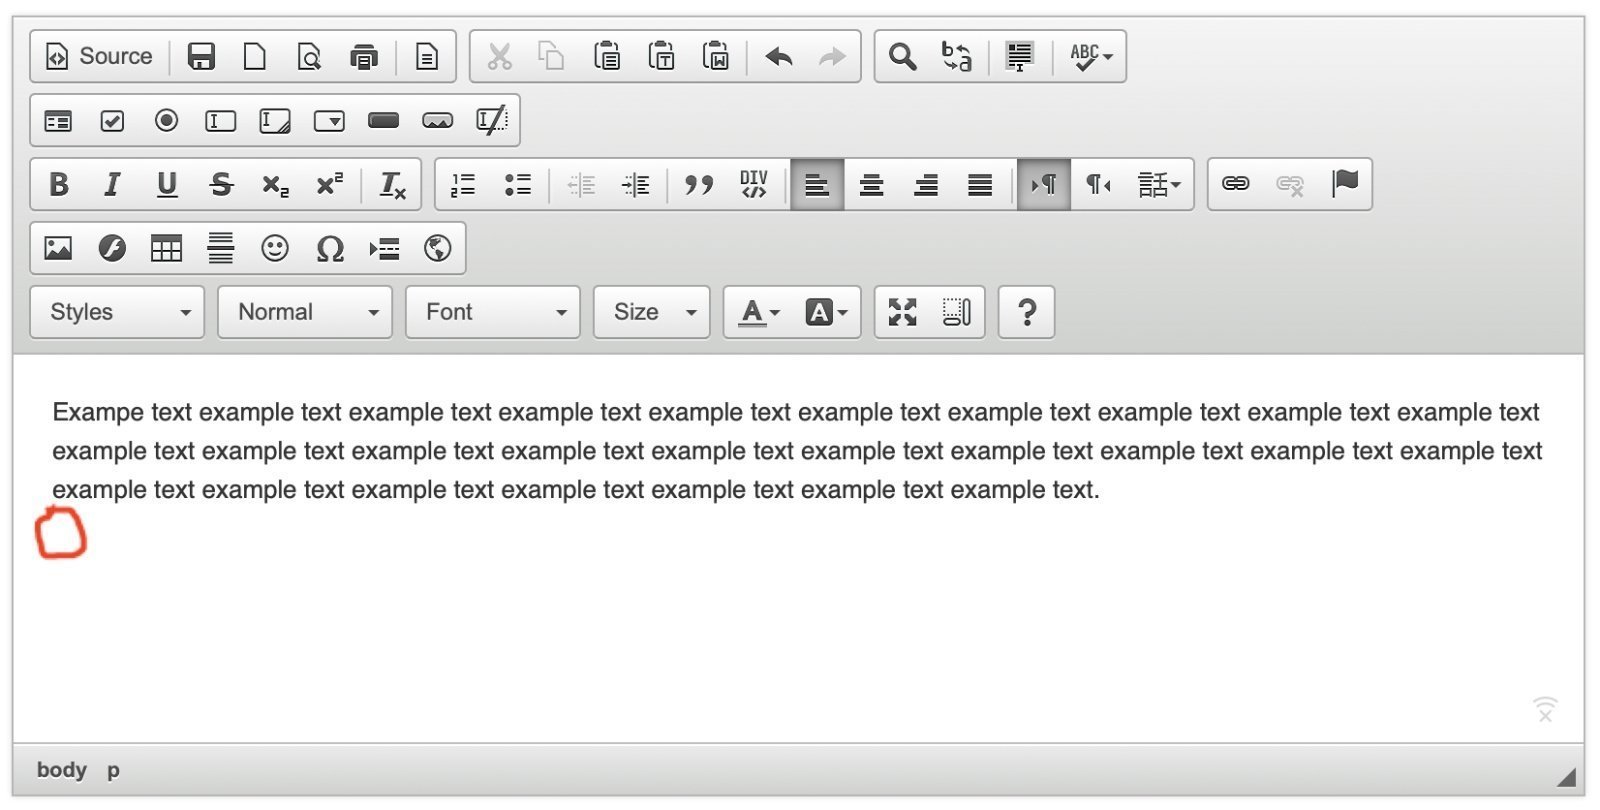
1. Start to write your article and click 'Enter' if you wish to add a photo in the new line after exact part of the text:
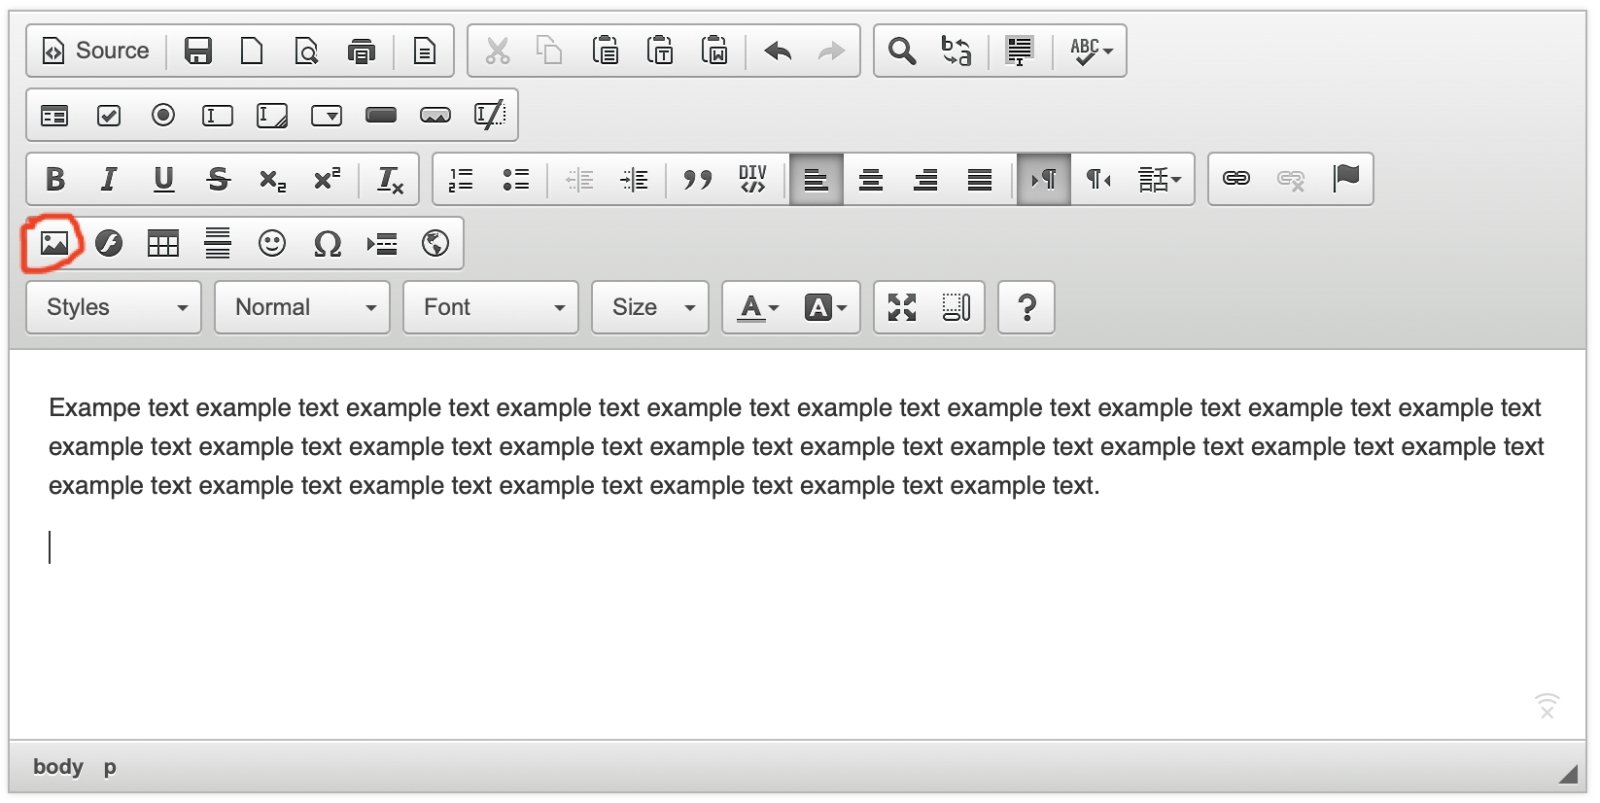
2. Click on the Image Icon in the editor:
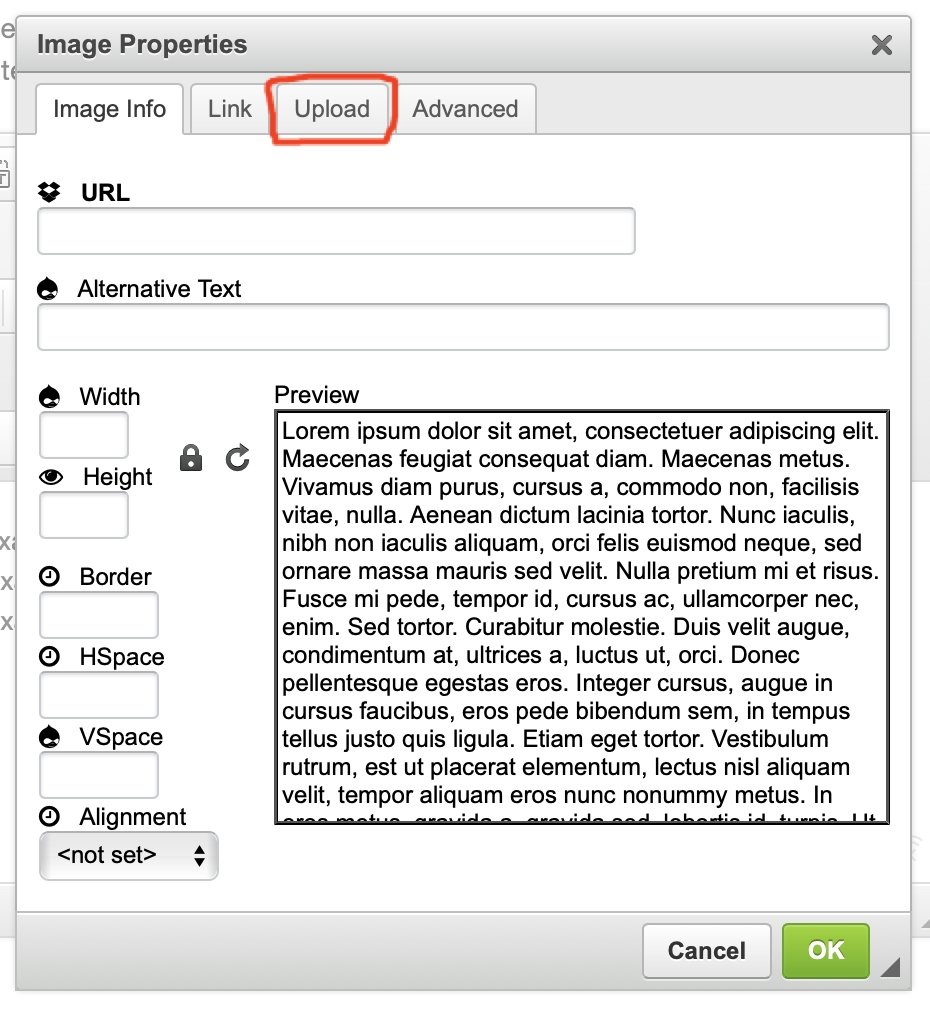
 3. Click on the 'Upload' tab in the window:
4. Then click 'Choose File' button: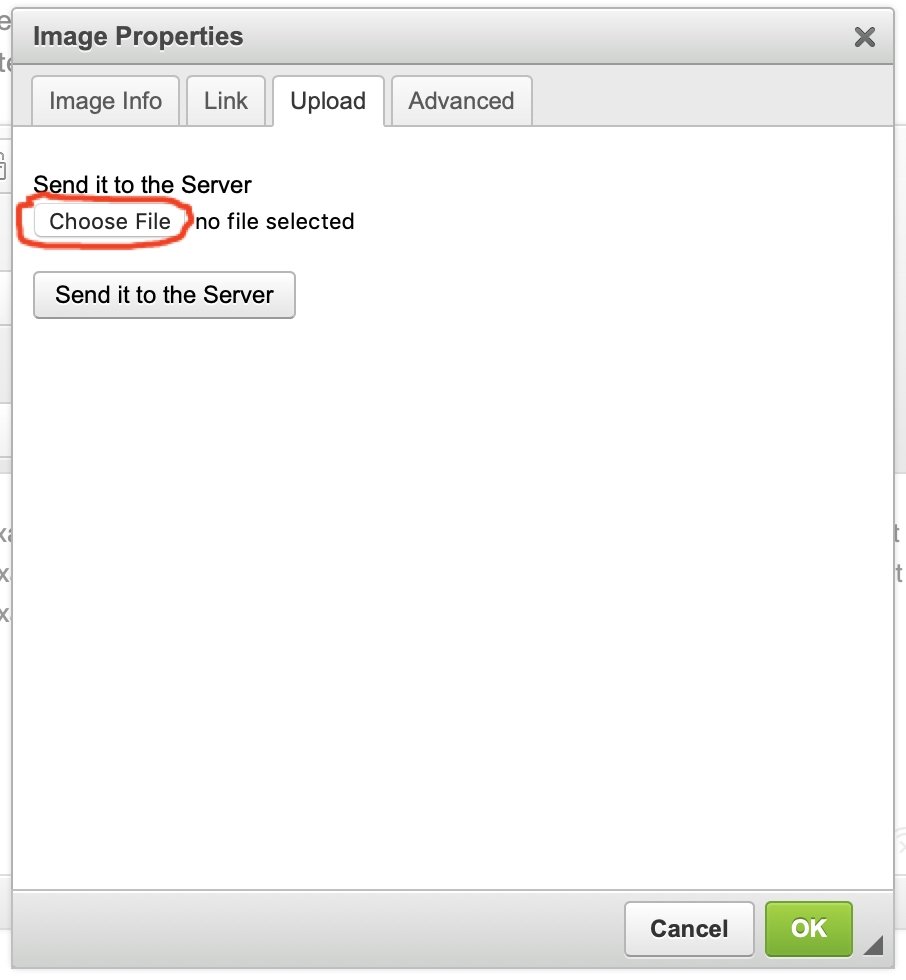 5. Next, choose a photo you wish to add to your article:
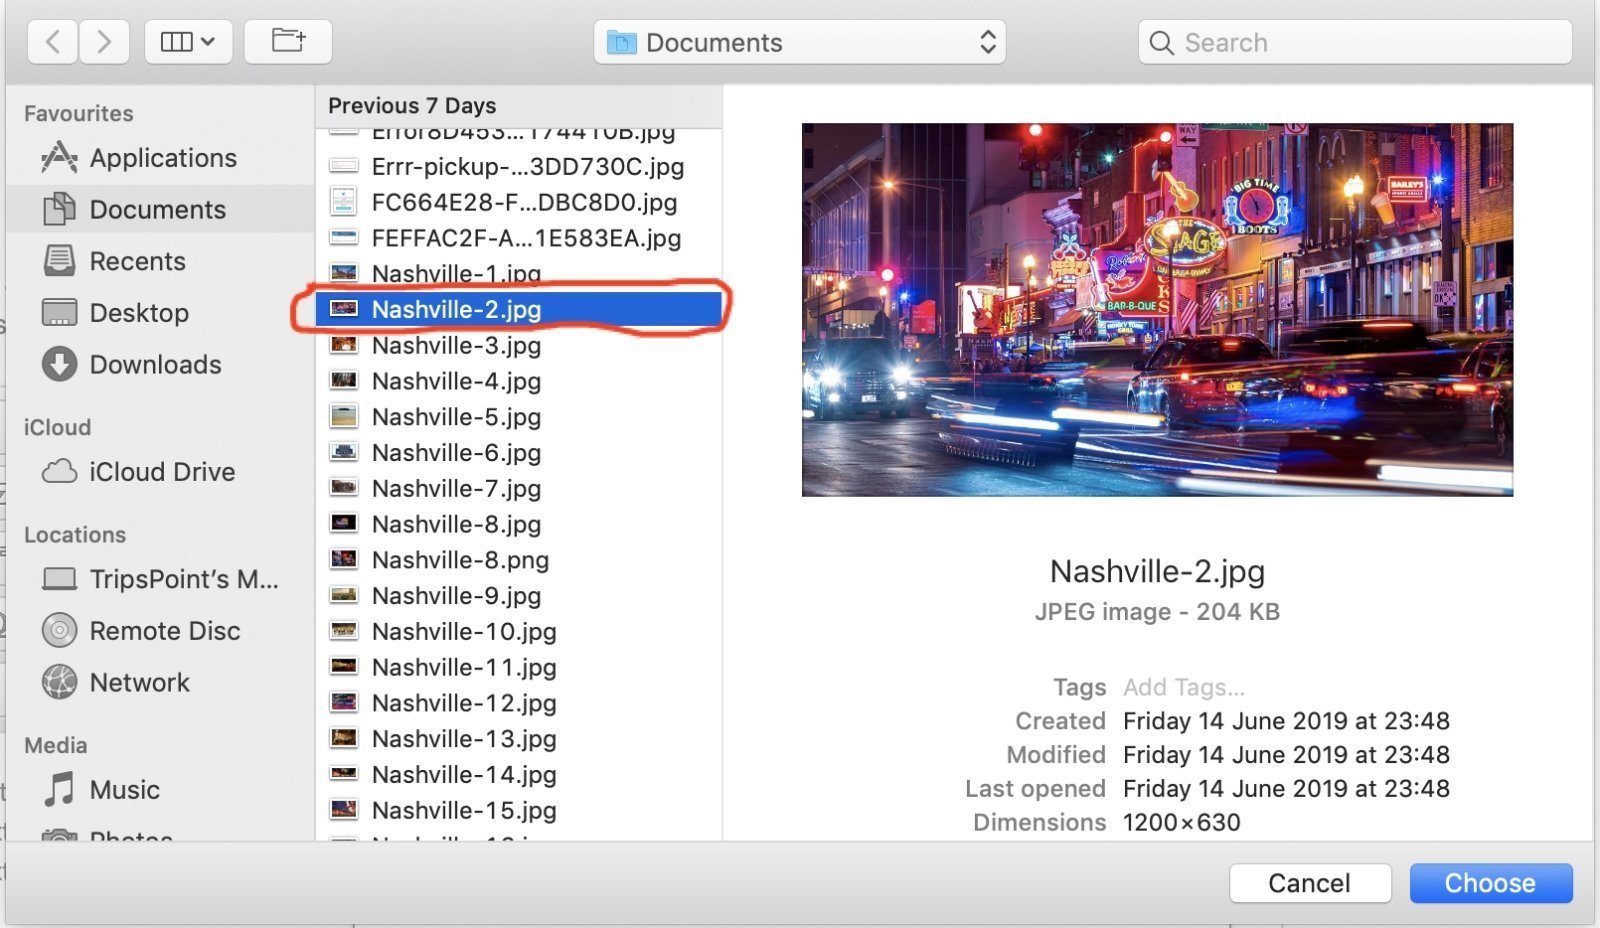 6. Then click the button 'Send it to the Server':
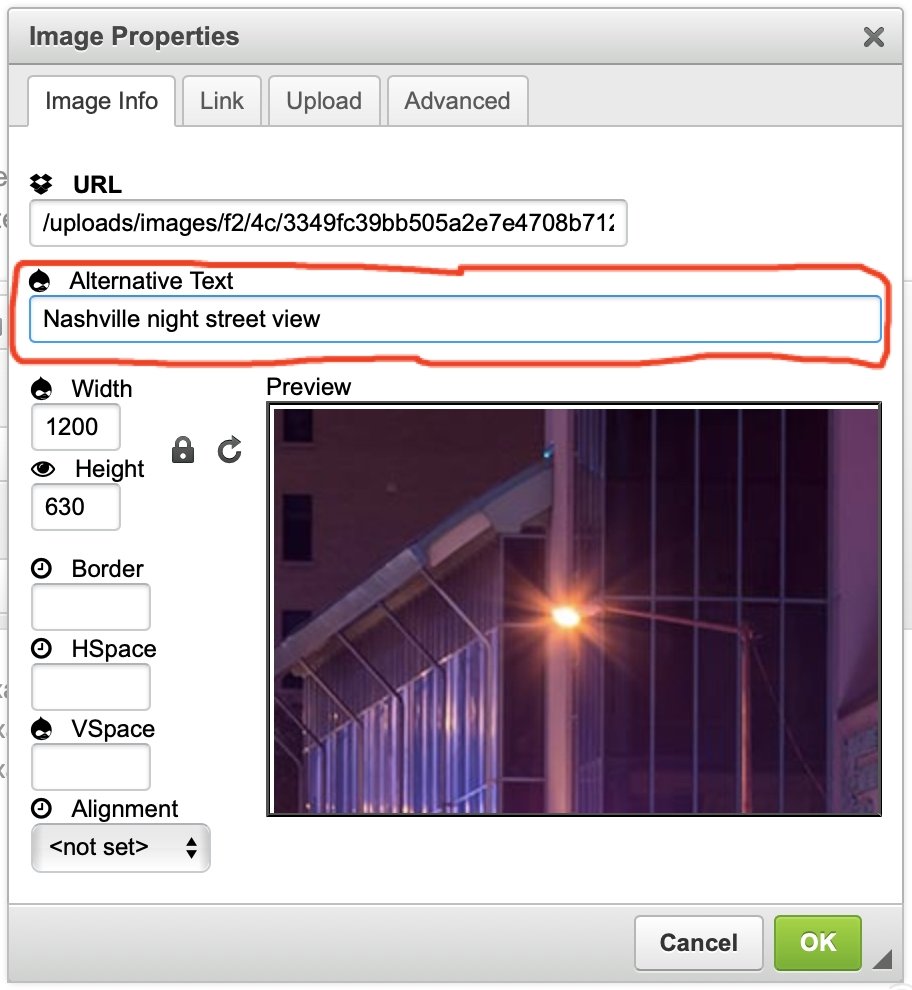
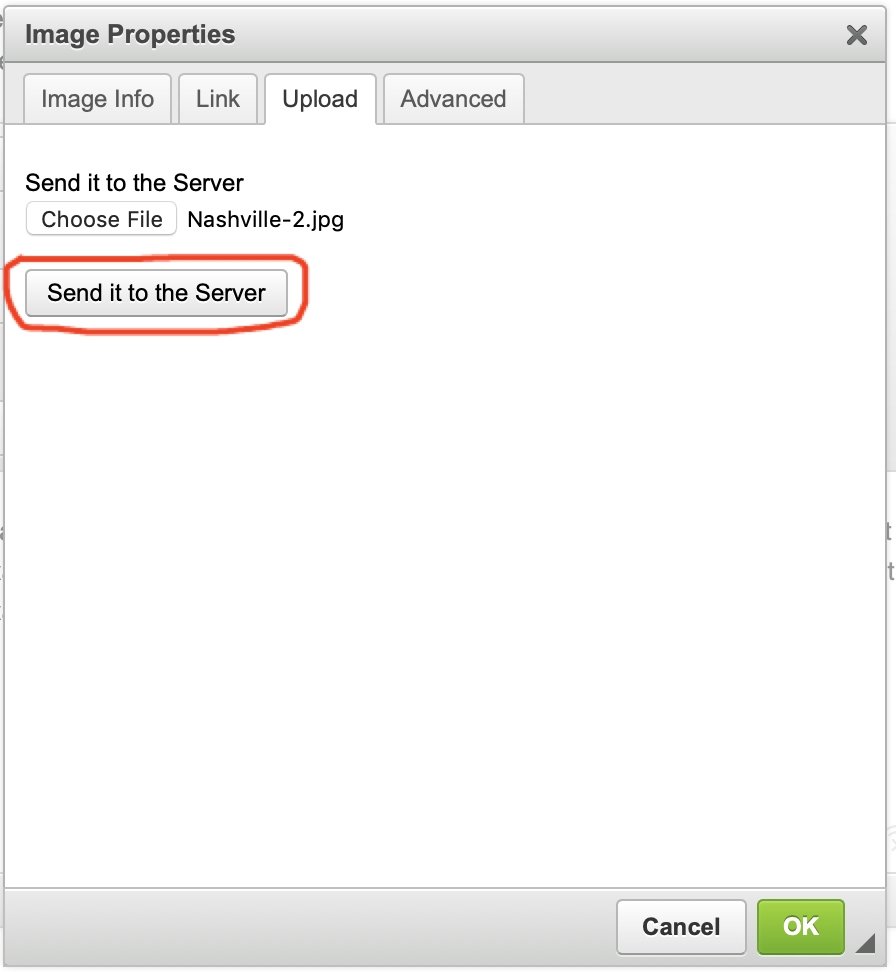 7. In the next window you DON'T change the photo size, etc - system will adjust it automatically. The only thing you have to do here is to describe in the 'Alternative Text' field what is showed on your photo:
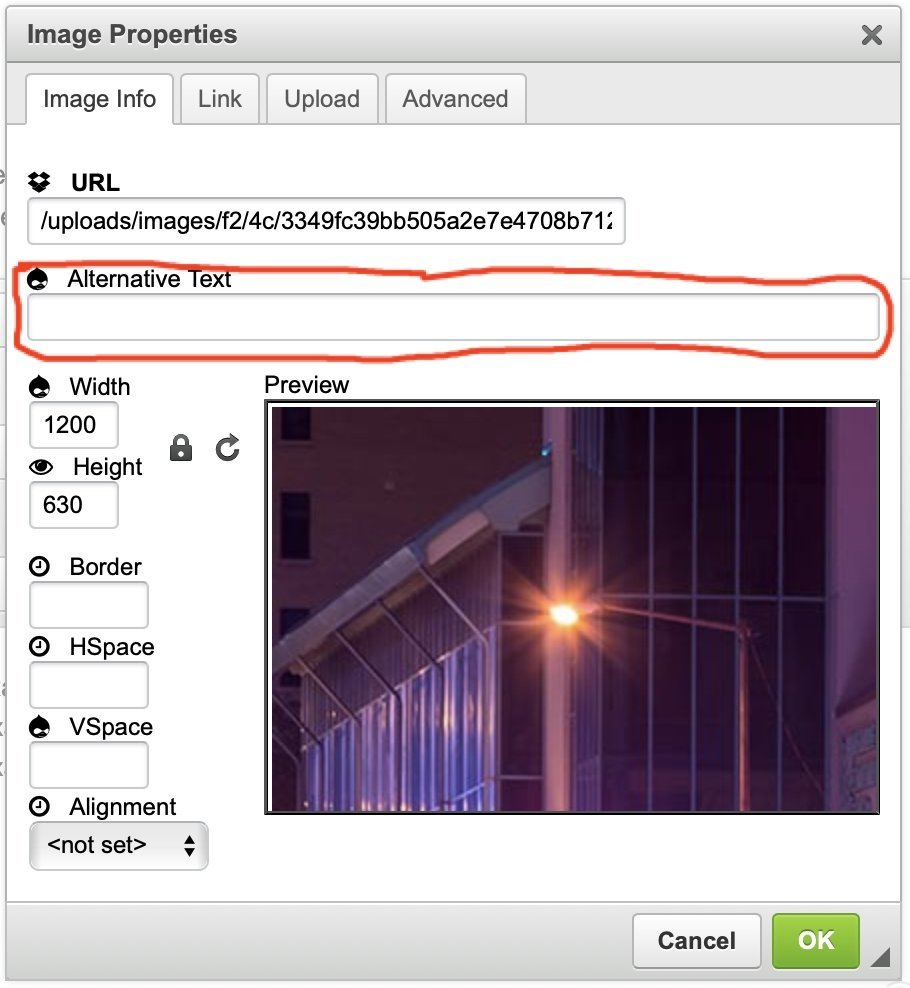 8. Here you have example of Alternative Text described:
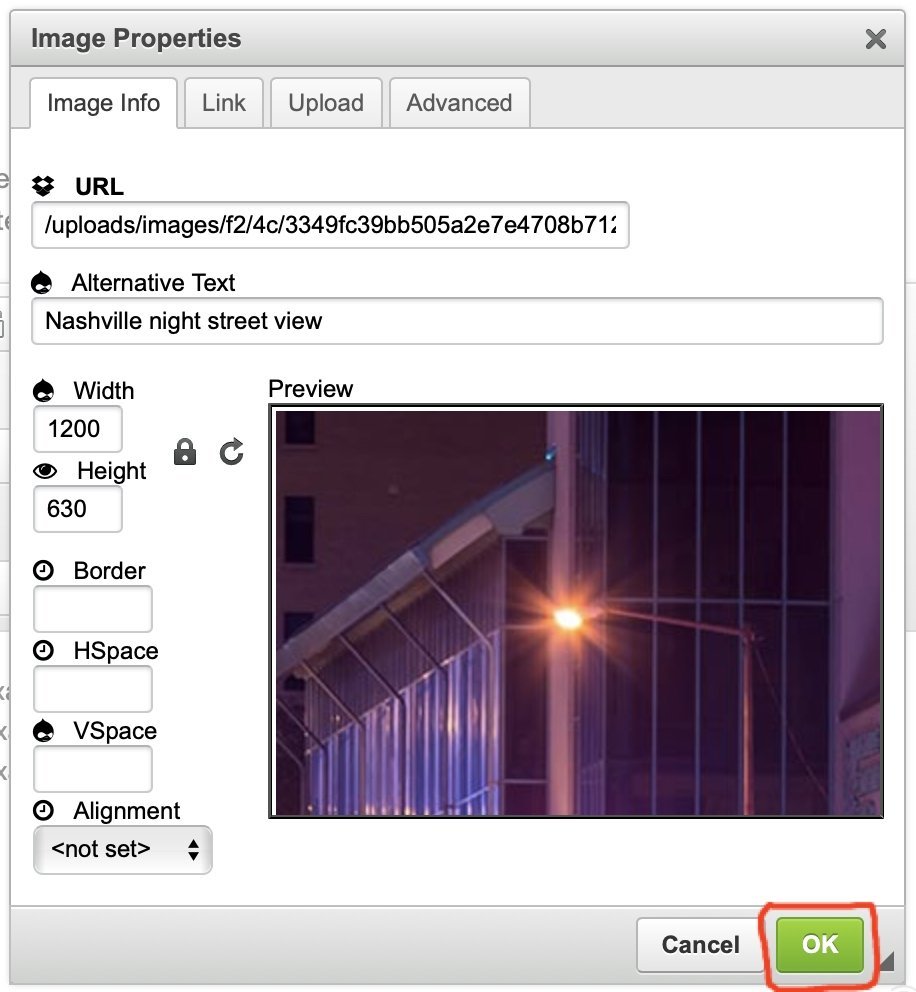
 9. Next, click green button 'OK':
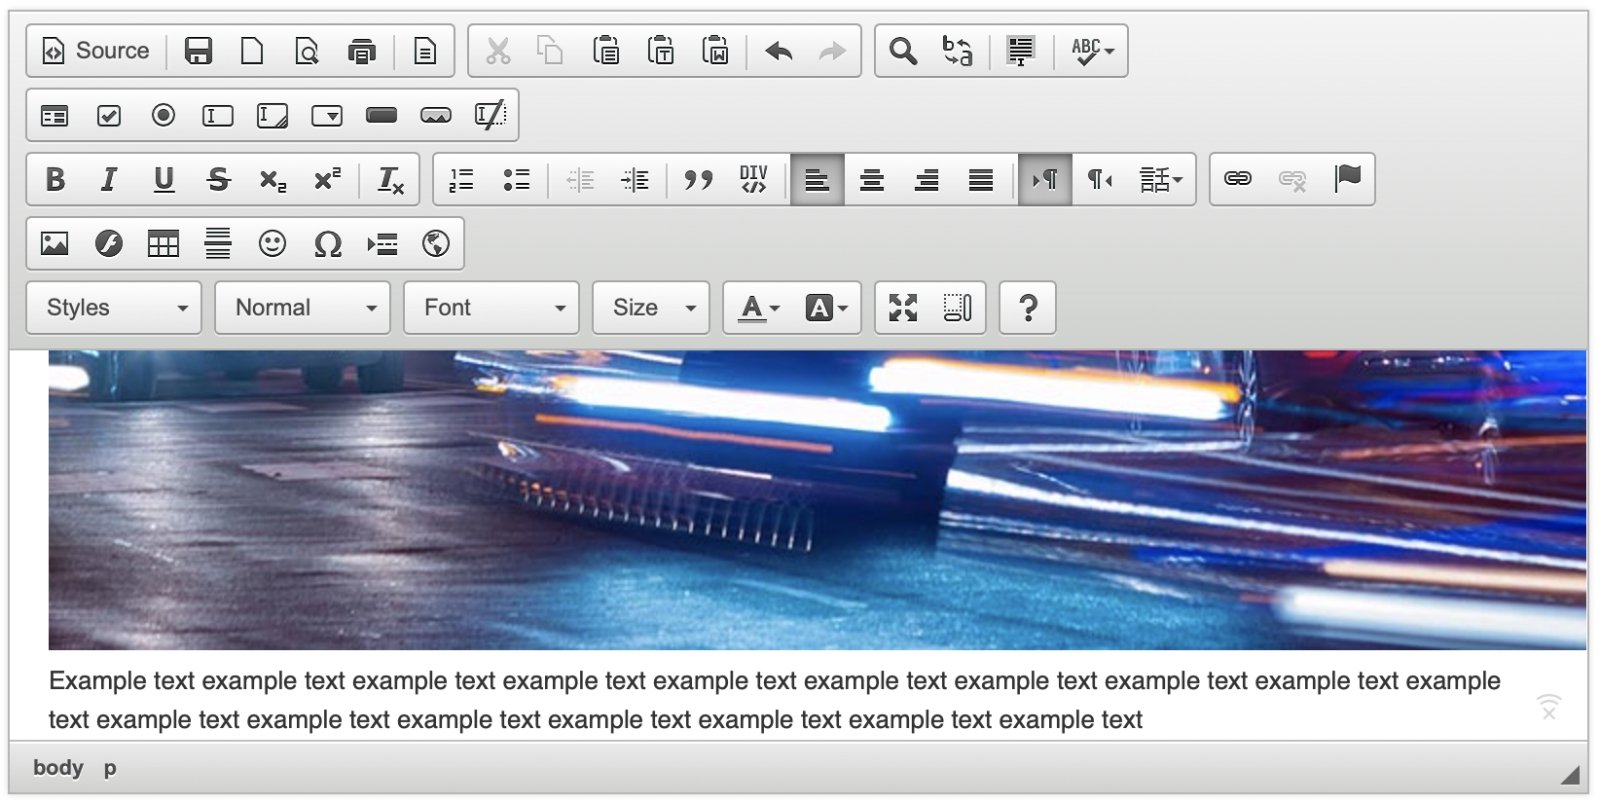
 10. Your photo is added now to your article. You can continue writing article and add your next photos to illustrate your article nicely.
Recommended tours
Review & Earn Travel Money
At TripsPoint you have endless possibilities to earn TripsPoint Money - this is your Travel Money your can use to book you next tours and activities everywhere you go.
Here's Space For Everyone
New tours